| Where | Works with Relm | What you do |
|---|---|---|
| VS Code (Copilot agent mode) | Yes | Add Relm to mcp.json |
| Visual Studio | Yes | Add a custom MCP server in Copilot Chat |
| JetBrains IDEs, Xcode, Eclipse | Yes | Add Relm to the plugin's mcp.json |
| Copilot CLI (terminal) | Yes | Run one command |
| Copilot cloud agent on github.com | Yes, for repository admins | Add Relm to the repository's MCP settings |
| Copilot Chat on github.com | No | It only uses GitHub's built-in tools |
| Microsoft 365 Copilot | Yes, through a Copilot Studio agent | Build an agent with Relm as a tool |
| Microsoft Copilot app (copilot.microsoft.com, Windows) | No | It has no custom MCP option |
You need a Relm API key. See Create an API key.
Copilot Business and Enterprise: your GitHub admin must switch on the MCP servers in Copilot policy first. It is off by default. They find it in the organization's Settings → Copilot → Policies. If your organization limits Copilot to an approved list of MCP servers, ask the admin to add https://api.relm.ai/mcp/. Copilot Free, Pro and Pro+ do not need this.
In the app: VS Code
- Open the Command Palette (⇧⌘P on macOS, Ctrl+Shift+P on Windows and Linux) and run MCP: Open User Configuration. For one project only, create
.vscode/mcp.jsonin it instead. - Paste this and save. VS Code asks for your key when the server starts and stores it securely, so the key never sits in the file:
{
  "inputs": [
    {
      "type": "promptString",
      "id": "relm-key",
      "description": "Relm API key (relm_sk_...)",
      "password": true
    }
  ],
  "servers": {
    "relm": {
      "type": "http",
      "url": "https://api.relm.ai/mcp/",
      "headers": { "Authorization": "Bearer ${input:relm-key}" }
    }
  }
}
- Select Start above
"relm"in the file and paste your key when asked. - Open Chat (⌃⌘I on macOS, Ctrl+Alt+I on Windows and Linux) and choose Agent.
- Select the Configure Tools button in the message box and check that the Relm tools are listed and ticked.
Copilot's newer Agent Host sessions skip servers that ask for input. If Relm does not appear there, set an environment variable RELM_API_KEY and use "Authorization": "Bearer ${env:RELM_API_KEY}" instead of the inputs block. On macOS, VS Code opened from the Dock does not see variables from your shell profile; start it with code from a terminal.
If Relm does not start, run MCP: List Servers, choose relm and Show Output to see why. GitHub's walkthrough with screenshots: Extend Copilot Chat with MCP. VS Code's reference: Add and manage MCP servers.
In the app: Visual Studio
- Open View → GitHub Copilot Chat and choose Agent mode.
- Select Tools, then +, then Add custom MCP server (in Visual Studio 2022, Add MCP server).
- Enter Server ID
relm, Type HTTP, and URLhttps://api.relm.ai/mcp/. - Under Headers, add
Authorizationwith the valueBearer relm_sk_.... - Select Save, then switch the Relm tools on in the Tools list. New tools start switched off.
Microsoft's guide: Use MCP servers in Visual Studio.
In the app: JetBrains, Xcode and Eclipse
The Copilot plugins for these IDEs share one file format. Note that the header sits inside requestInit:
{
  "servers": {
    "relm": {
      "url": "https://api.relm.ai/mcp/",
      "requestInit": {
        "headers": { "Authorization": "Bearer relm_sk_..." }
      }
    }
  }
}
Where to open the file:
- JetBrains: Copilot icon in the status bar → Open Chat → Agent → the tools icon → Add MCP Tools.
- Xcode: GitHub Copilot for Xcode settings → MCP tab → Edit Config. Check under Available MCP Tools.
- Eclipse: Copilot icon in the status bar → Open Chat → Configure Tools…, or Preferences → GitHub Copilot → MCP.
These plugins store the key in the file as plain text. Use a Read only key.
In the terminal: Copilot CLI
copilot mcp add --transport http \
  --header "Authorization: Bearer relm_sk_..." \
  relm https://api.relm.ai/mcp/
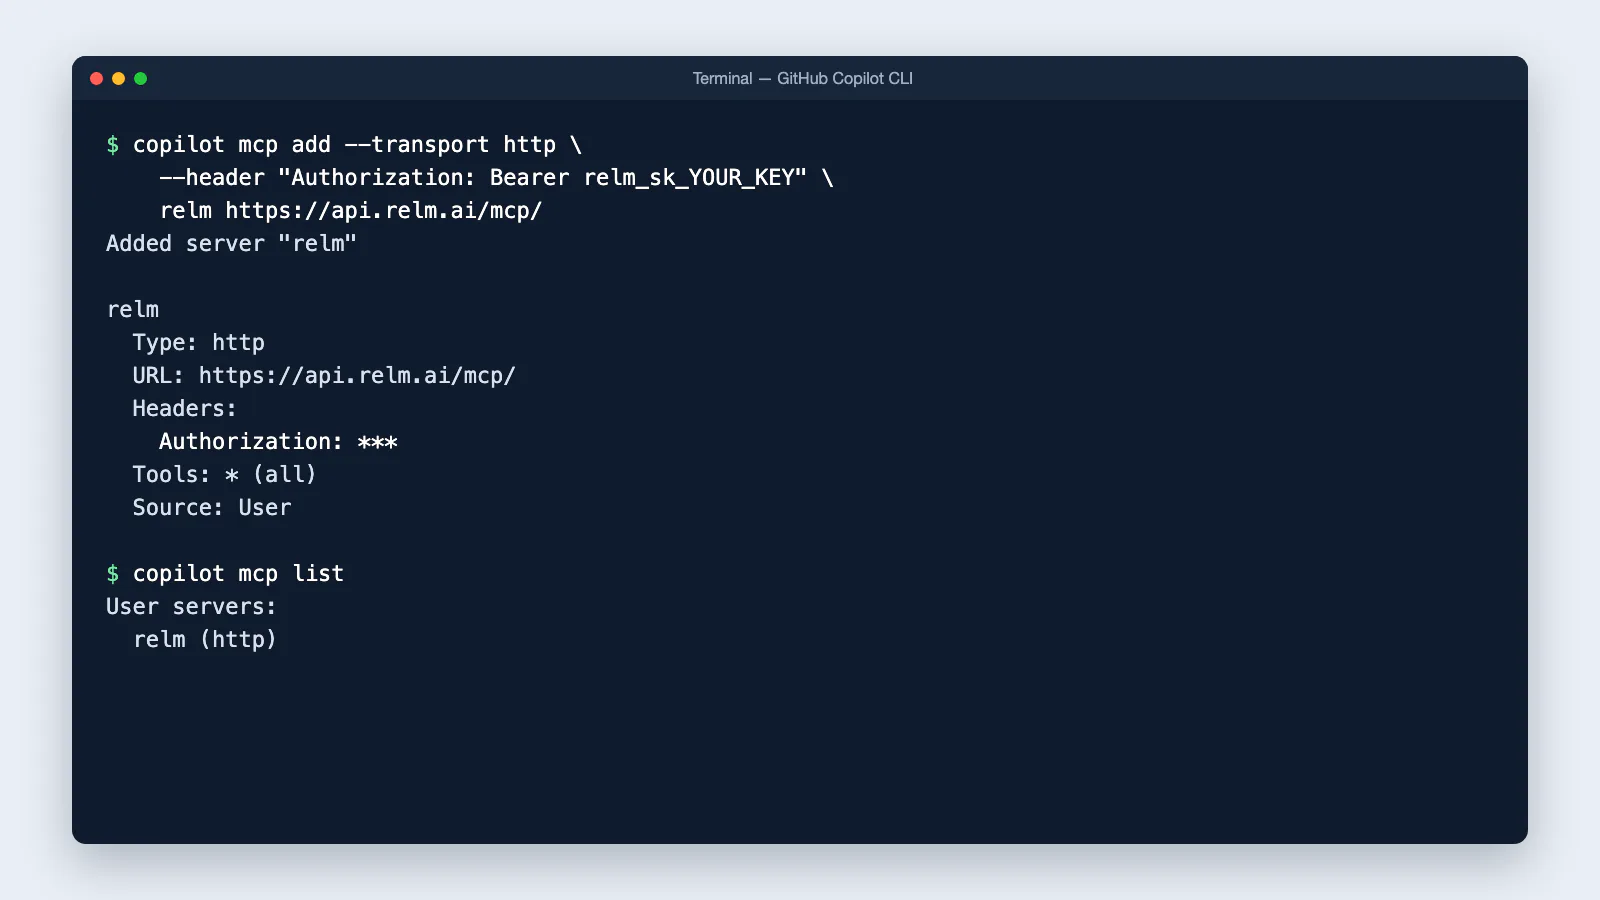
Check it with copilot mcp get relm, or /mcp inside Copilot. You can also run /mcp add inside Copilot and fill in the form: Server Type HTTP, the URL, and HTTP Headers {"Authorization":"Bearer relm_sk_..."}.
The server is saved to ~/.copilot/mcp-config.json, which the GitHub Copilot desktop app also reads. Copilot asks before each tool runs. GitHub's guide: Adding MCP servers for Copilot CLI.
In the browser: Copilot cloud agent on github.com
The Copilot cloud agent (formerly the coding agent) can use Relm while it works on an issue. A repository admin sets it up:
- In the repository, open Settings → Copilot → MCP servers.
- Paste this under MCP configuration and select Save MCP configuration:
{
  "mcpServers": {
    "relm": {
      "type": "http",
      "url": "https://api.relm.ai/mcp/",
      "headers": { "Authorization": "Bearer $COPILOT_MCP_RELM_API_KEY" },
      "tools": ["*"]
    }
  }
}
- Open Settings → Secrets and variables → Agents and add a secret named
COPILOT_MCP_RELM_API_KEYwith your key as its value. Secret names must start withCOPILOT_MCP_. - To check, assign an issue to Copilot, open its pull request, select View session, and expand Start MCP Servers. The Relm tools are listed there.
The cloud agent runs tools without asking for approval. Use a Read only key, and list only the tools it needs in "tools" instead of "*" if you want to restrict it further.
Copilot Chat on github.com cannot use Relm: it only has GitHub's built-in tools. Use VS Code or the Copilot CLI instead.
GitHub's guide: Configure MCP servers for your repository.
In the browser: Microsoft 365 Copilot (through Copilot Studio)
Microsoft 365 Copilot reaches Relm through an agent you build in Copilot Studio. The agent's maker does steps 1 to 6; everyone else just uses the agent.
- In Copilot Studio, open your agent, go to Tools → Add a tool → New tool → Model Context Protocol.
- Enter Server name
Relm, a Server description such as "Real-estate property data, underwriting runs and public records from Relm", and Server URLhttps://api.relm.ai/mcp/. - Under Authentication, choose API key, set Type to Header and the header name to
Authorization, then select Create. - Choose Create a new connection and enter
Bearer relm_sk_...as the key, including the wordBearerand the space. Select Add to agent. - On the tool's page, choose whose key it uses under Credentials to use:
- End user credentials (default): each person enters their own Relm key the first time.
- Maker-provided credentials: one key for everyone, acting with that key's access.
- Test in the Test pane, then Publish and add the Teams and Microsoft 365 Copilot channel.
People then pick the agent from the Agents list in Microsoft 365 Copilot, or type @ and its name. Microsoft's guide: Connect to an existing MCP server.
Sign in instead of a key: in step 3, choose OAuth 2.0 and then Dynamic discovery, and skip step 4. Copilot Studio finds Relm's sign-in page by itself, and each person signs in with their own Relm account and chooses their workspace the first time they use the agent. Nobody shares a key, and a signed-in person gets what a Read & write key allows.
The consumer Microsoft Copilot app and copilot.microsoft.com only offer a fixed list of connectors, so they cannot connect to Relm.